How Is a Flush Mount Door Installed in Bridgeport, CT?

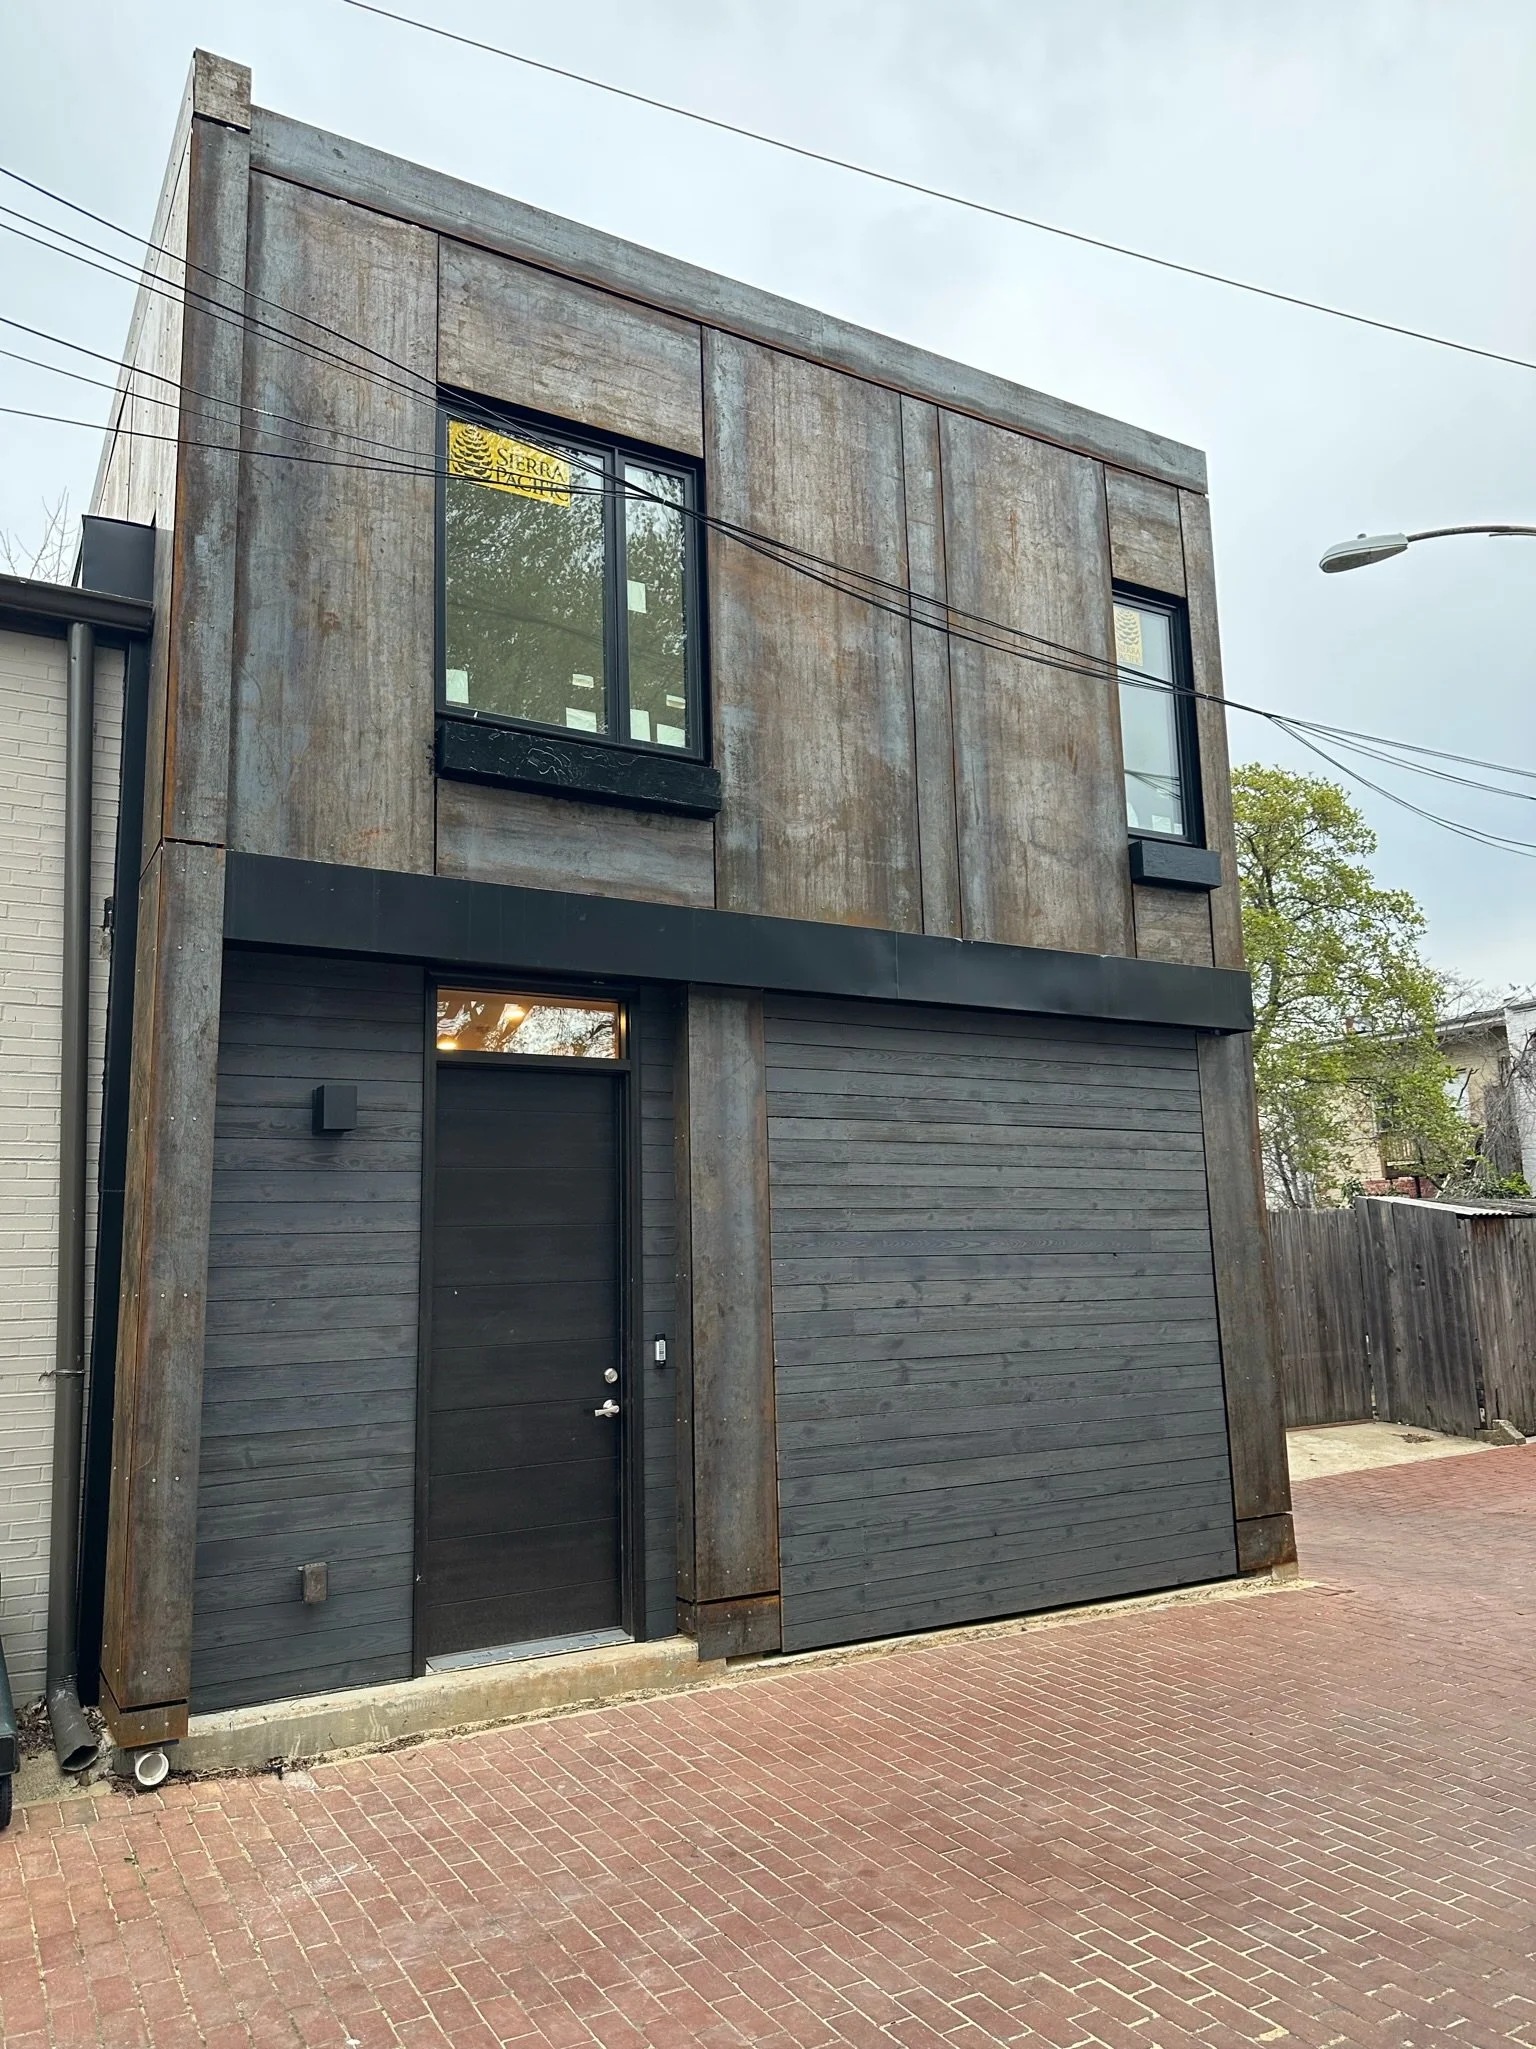
A Flush Mount Door installation in Bridgeport, CT, is a precision-driven process that affects alignment, sealing, insulation, and long-term durability. This style sits flush with the exterior wall, so even minor measurement issues can disrupt the seamless look and curb appeal.

If you are comparing a new garage door style, photos of finished installs help you see how the flush profile blends into the home’s exterior and minimizes shadow lines. This guide explains what happens during professional installation from opening checks through final safety testing and documentation.

Why Does a Flush Mount Door Installation Plan Matter in Bridgeport, CT?

A Flush Mount Door installation plan matters in Bridgeport, CT, since the door must sit flush against the exterior wall while the track, hinges, and spring setup are calibrated for smooth movement, strong sealing, and long-term durability in harsh weather conditions, so professionals confirm requirements such as:

  • The rough opening is measured for custom sizing so the door face aligns flush and maintains a seamless look with clean shadow lines.
  • Track layout and hardware placement support sectional garage doors as they travel on a curved path without binding or uneven wear.
  • Spring calibration matches door weight so functionality stays stable, and the opener is not forced to carry the load.
  • Seal contact and insulation fit are verified to limit heat loss and protect garage space and belongings from moisture intrusion.
  • Shipping condition is accounted for, so dents, cladding damage, or alignment changes do not compromise final precision or craftsmanship.

To understand how shipping variables and local staging affect installation scheduling, handling, and readiness checks tied to these requirements, read our guide on Shipping vs Local Install: What to Expect with a Flush Mount Door, which explains the key differences homeowners should expect before installation begins.

Flushmount door installaation

When Professional Installation Is Required and What It Includes

A flush-mount door should be installed by a trained team when weight, spring tension, and flush alignment must be set precisely for safe, reliable operation.

Before the installation appointment begins, professionals confirm:

  • Springs are tuned to door weight, so lifting stays balanced and controlled.
  • Tracks, hinges, and rollers are aligned to support smooth travel without binding.
  • Opener limits and safety reversal are tested so the system responds correctly under load.
  • Seals and insulation fit are confirmed to reduce heat loss and protect the garage space.

With these checks completed, a Flush Mount Door installation delivers a true seamless look, consistent performance, and dependable long-term durability in Bridgeport, CT.

Pre-Install Planning for Flush Mount Garage Doors in Bridgeport, CT

Pre-install planning keeps scheduling, materials, and site readiness aligned so the installation stays efficient and the flush profile seals cleanly against the exterior.

Before installation day, teams review:

  • Delivery condition and panel finish so that handling issues do not affect alignment or durability.
  • Rough opening measurements and mounting surfaces so the door sits flush with consistent shadow lines.
  • Track, spring, and opener compatibility to keep movement smooth and controlled.
  • Insulation and perimeter sealing prevent heat loss, and the garage space stays protected.

Shipping-related inspection details connect directly to installation readiness, and our blog on What Should You Check When a Flush Mount Door Arrives Shipped? explains the exact checks that help prevent delays and finish problems before work begins.

Garage Opening Readiness and Custom Garage Door Specifications

Opening readiness and specifications must match closely so that the Flush Mount Door fits cleanly, travels smoothly, and maintains a seamless exterior finish.

Before panels and hardware are staged, professionals confirm:

  • Rough opening dimensions and framing condition so the door sits flush without uneven gaps.
  • Door size, weight, and insulation package so springs and hinges are matched for balanced movement.
  • Track clearance and headroom so sectional travel follows the curved path without binding.
  • Panel design and trim alignment to support curb appeal and clean shadow lines.

Project scope and safety requirements often depend on what these checks reveal, and our blog on Do Flush Mount Doors Need Professional Installation? explains when a professional setup is required and what a full-service installation should include.

Step-by-Step Installation Workflow for a Flush Mount Door

Step 1: Site Verification and Final Measurements

Accurate site verification lays the foundation for a flush-mount door installation by confirming the rough opening, clearances, and mounting surfaces before hardware or panels are staged.

Confirm readiness by checking:

  • Rough opening width and height against the order sheet for proper custom sizing
  • Header and jamb surfaces for square alignment and secure fastening points
  • Floor level at the threshold to avoid a visible taper across the flush face
  • Sideroom and headroom clearance to support smooth travel on overhead garage doors
  • Nearby obstructions inside the garage space that can interfere with tracks or opener components

Early measurement verification supports precise installation and helps the finished flush profile sit cleanly against the exterior.

Step 2: Track Layout, Hardware Staging, and System Compatibility

A correct track layout keeps the Flush Mount system moving smoothly by matching hardware placement to the sectional door’s curved path and the opener’s required geometry.

During layout and staging, teams typically confirm:

  • Vertical and horizontal track positions to reduce rubbing and uneven roller wear
  • Bracket locations that keep sectional garage doors centered through travel
  • Hinge selection and spacing so panels articulate evenly without twisting
  • Roller type and bearing condition for quiet movement and minimal upkeep
  • Opener compatibility and mounting approach for stable functionality over time

Proper staging reduces delays, protects durability, and helps maintain clean profile designs without unwanted shadow lines.

Step 3: Section Placement, Leveling, and Secure Mounting

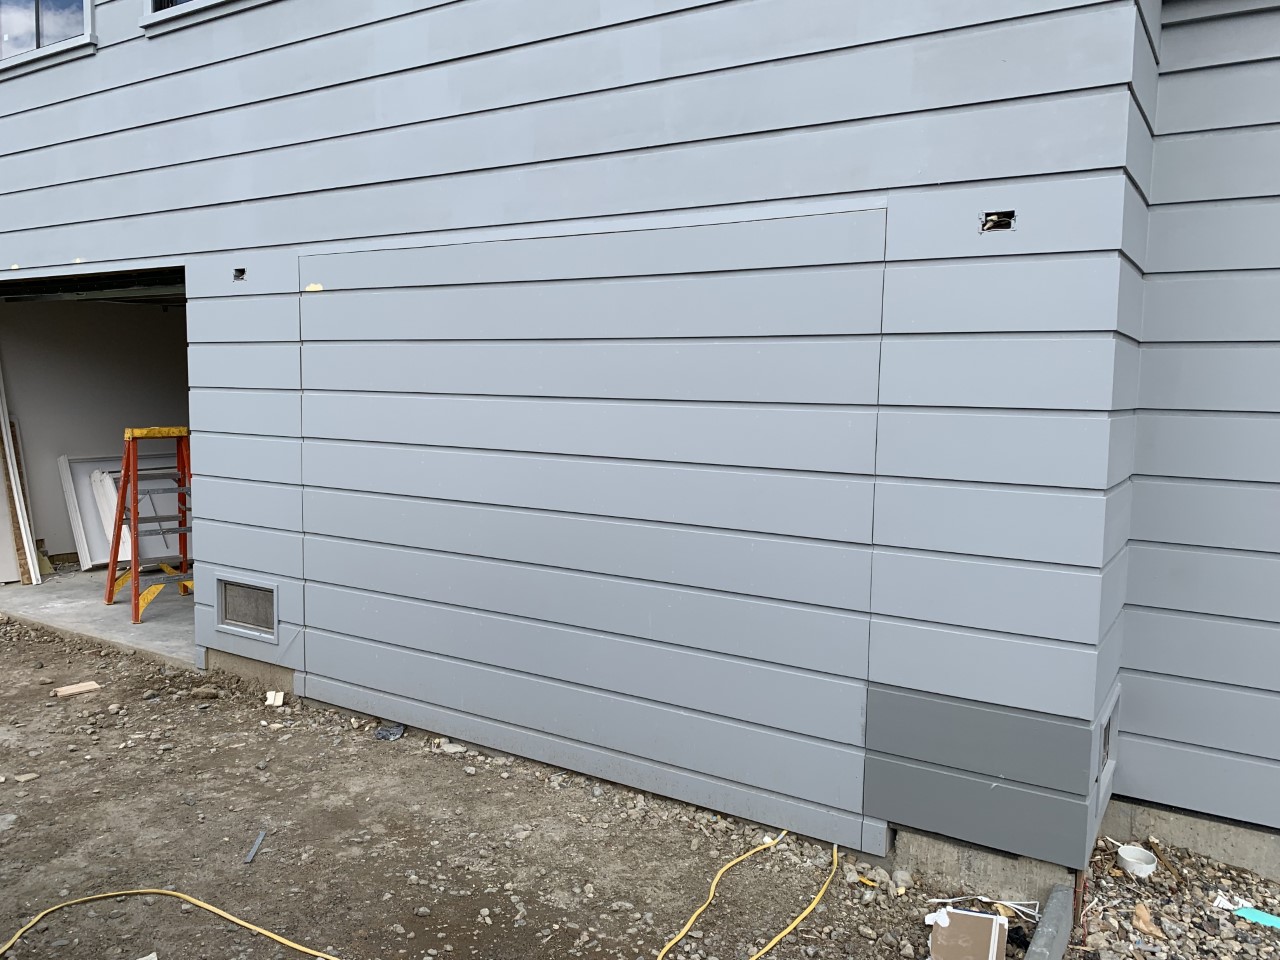
Panel placement builds a seamless appearance by stacking sections in a controlled sequence that keeps the door face flush and consistent across the outside of a building.

Alignment work usually focuses on:

  • Bottom section leveling to prevent a sloped reveal against the exterior wall
  • Hinge and roller installation to keep sections tracking evenly from start to finish
  • Fastener torque consistency so vibration does not loosen hardware over time
  • Edge spacing at jambs to avoid scuffs and maintain a uniform flush look
  • Face alignment across the panels to reduce shadow lines and protect curb appeal

Consistent section placement supports a seamless look and helps the new garage door operate with stable, repeatable movement.

Step 4: Spring System Setup and Counterbalance Calibration

Spring calibration protects safety and performance by balancing door weight so the Flush Mount Door lifts smoothly without overloading the opener or stressing hinges.

Counterbalance setup typically includes:

  • Spring type selection based on door weight, height, and insulation package
  • Tension adjustment so the door holds position without drifting or slamming
  • Lift check to confirm smooth travel through the curved path without binding
  • Hardware review around shafts, drums, and bearings for long-term durability
  • Balance verification to protect belongings by preventing sudden drops

According to Clopay, springs counterbalance door weight and help prevent a door from feeling unusually heavy, which reinforces why calibrated spring tension is essential for safe operation and longevity.

Step 5: Reveal Consistency, Surface Alignment, and Weather Sealing

Reveal-and-seal checks protect the flush finish by confirming consistent gaps, tight seal contact, and reliable insulation performance along the exterior wall section the door occupies.

Sealing and alignment verification often covers:

  • Reveal uniformity along both sides to maintain a seamless appearance
  • Seal compression at the top and sides to reduce heat loss and drafts
  • Bottom seal contact across the floor to help block moisture and debris
  • Panel face alignment to support aesthetic appeal and exterior elegance
  • Trim and cladding edges to keep the flush surface clean and durable

Strong seal contact and even reveals help the Flush Mount design stay flush, reduce exterior exposure, and support minimal maintenance in harsh weather conditions.

Step 6: Opener Integration and Force and Travel Verification

Opener integration completes the system by syncing travel limits, safety sensors, and force settings so the Flush Mount Door cycles smoothly without strain or unsafe resistance.

Opener verification usually includes:

  • Travel limit setup so the door stops at the correct open and close positions
  • Force setting confirmation so the motor responds correctly under load
  • Sensor alignment checks so closing cycles do not fail unexpectedly
  • Reversal testing so the system reacts safely to obstruction conditions
  • Noise and vibration review to protect hinges and support long-term durability

Chamberlain explains that properly aligned safety sensors help confirm a clear beam path for closing, which directly affects whether the opener completes a close cycle or reverses for safety.

Step 7: Final Safety Inspection, Functional Testing, and Walkthrough

Final testing confirms that the Flush Mount Door performs safely and consistently by validating balance, travel behavior, sealing contact, and system response across repeated cycles.

A complete walkthrough typically verifies:

  • Smooth travel through the full cycle to confirm stable functionality
  • Hardware tightness at hinges, brackets, and track fasteners for durability
  • Balanced lift behavior to protect the opener and reduce wear over time
  • Seal contact and exterior alignment to support curb appeal and practicality
  • Documentation handoff, including warranty notes and support contact via email

Reliable final testing supports long-term longevity, protects the home’s exterior finish, and confirms the door operates as the right garage door for Bridgeport, CT, conditions.

Timeline Expectations From Arrival to Final Testing

Timeline expectations follow a clear sequence from delivery through closeout, with additional time added only when opening conditions, hardware needs, or scheduling constraints slow progress.

Typical timeline milestones include:

  • Arrival and staging of door sections, hardware, and documentation for the install day.
  • Opening verification and layout confirmation before tracks and springs are set.
  • Track and hardware installation followed by section placement and alignment.
  • Spring calibration, opener integration, and full-cycle safety testing before walkthrough.

Timeline consistency helps avoid scheduling gaps between staging, calibration, and final testing across areas served, supporting smoother flush-mount door installations from start to finish.

Installation Quality Checks That Protect Long-Term Performance

Quality checks confirm that the door runs smoothly, seals tightly, and maintains a clean, flush finish that holds up over years of use.

During final verification, professionals check:

  • Door balance and smooth travel so springs and opener load stay controlled.
  • Track alignment and roller movement to minimize binding and uneven wear.
  • Flush face alignment and consistent reveals so shadow lines stay even on the exterior.
  • Seal contact and insulation fit to reduce heat loss and moisture intrusion.

Passing these checks helps a Flush Mount Door deliver dependable durability, stable functionality, and long-lasting curb appeal.

Post-Install Deliverables and Warranty Documentation

Post-install deliverables confirm testing results, warranty coverage, and system details, ensuring service support and safe operation remain easy to manage.

After installation, homeowners typically receive:

  • Warranty documentation for door materials and installation scope, along with service contact details by email.
  • Safety test confirmation showing sensor response and reversal behavior were verified.
  • Opener settings and control guidance for normal daily functionality and secure access.
  • Product documents for insulation, cladding, colours, and hardware used on the door.

Proper documentation supports long-term durability, reduces confusion during future service, and keeps the flush-mount door operating reliably.

Professional Flushmount door installation

Professional Flush Mount Door Installation in Bridgeport, CT

A professional Flush Mount Door installation in Bridgeport, CT, ensures smooth operation, tight sealing, and a seamless look that enhances curb appeal and long-term durability. Precise measurement, spring calibration, opener verification, and final safety testing help the door perform reliably through harsh weather conditions and daily use.

Flush Mount Door Co. delivers precise installation that protects insulation performance, durability, and the clean flush profile across the home’s exterior. If a Flush Mount Door installation is on the schedule in Bridgeport, CT, contact us or give us a call today to schedule your consultation and confirm dependable results from the start.

Frequently Asked Questions

How long does a flush-mount door installation appointment usually take?

Most appointments take a single scheduled visit, but total time depends on door size, opener integration, and opening readiness. Extra time may be needed if the rough opening requires correction or if hardware calibration takes longer due to door weight and insulation.

Yes. Compatibility depends on the opener’s lifting capacity, rail setup, and safety features, especially with heavier insulated doors. A technician confirms proper travel limits, force settings, and sensor alignment so the system runs smoothly without strain.

Sometimes. Track selection depends on the door’s thickness, weight, and available clearance, especially for flush profiles and specific panel geometries. A matched track setup helps reduce binding, support smooth travel, and keep face alignment consistent.

An out-of-square opening can cause uneven gaps, sealing issues, and visible shadow lines across the door face. A professional may recommend framing adjustments or hardware alignment corrections so the door sits flush and cycles without rubbing.

Yes. Permit needs can depend on scope, structural changes, and local building requirements in Bridgeport, CT. A local installer can confirm whether permits apply and what documentation is needed before the installation date.

Yes. Limited headroom can still be accommodated with the right track configuration and a compatible opener setup. A site check confirms clearance, travel path, and hardware selection so the door operates safely without interference.

Yes. Added insulation increases door weight, which affects spring sizing, tension calibration, and sometimes hinge and track requirements. Proper matching helps reduce heat loss while keeping movement balanced and controlled.

Final testing confirms smooth travel, balanced lift behavior, and stable closing performance, with no binding or hesitation. A flush-mount garage door company also verifies sensor response and reversal behavior to ensure the system reacts correctly if an obstruction is detected.

Yes. Coastal moisture and salt exposure can accelerate corrosion of metal parts and wear some finishes. Protective hardware choices and routine professional checkups help preserve durability and appearance.

Warranty paperwork should list what is covered for installation workmanship versus door materials and parts. It should also include service contact details, the installation date, and any product documentation tied to the door system.